Quick Answer
A hive inspection takes 15–30 minutes and involves working through each frame to verify a laying queen, healthy brood, adequate food stores, and no signs of disease. Inspect every 7–10 days during your first season, on warm sunny days between 10 AM and 2 PM. Use the FEED checklist: Food, Eggs, Expansion, Disease/pests.
Your first hive inspection is simultaneously exciting and anxiety-inducing. You've spent weeks setting up your hive, reading about bees, and now it's time to open it up with 50,000 stinging insects inside. The good news: with the right preparation and approach, inspections become one of the most enjoyable parts of beekeeping — a meditative, focused practice where you're genuinely reading the health of a living superorganism.
Before You Open the Hive: Equipment Checklist
- Beekeeping suit: Full suit with attached fencing veil — see our best beekeeping suits guide for recommendations
- Lit smoker: Loaded with natural fuel (wood chips, pine needles, corrugated cardboard) and producing cool, white smoke
- Hive tool: A J-hook or standard flat hive tool ($8–12) for prying apart propolis-glued frames
- Notepad or phone: Record what you find — memory during and after inspections is unreliable, especially early on
How to Light and Use Your Smoker
A properly lit smoker is your most important tool for a calm inspection. Smoke triggers a feeding response in bees — they assume their hive may be threatened by fire, gorge on honey, and become docile and focused on eating rather than defending. Cool, white smoke is the target; hot, gray smoke burns bees and makes them defensive. Penn State Extension has excellent hive management resources.
- Crumple a small amount of paper or dry grass and light it in the bottom of the smoker firebox
- Puff the bellows rapidly to establish a flame
- Add larger fuel (cardboard, wood chips, pine needles, burlap) on top of the burning paper
- Continue pumping bellows until cool white smoke flows freely
- Fill the firebox 2/3 full with fuel — a full firebox lasts 30–45 minutes
- Test smoke temperature: hold your hand 6 inches from the smoker nozzle for 2 seconds. If it burns, let it cool before using.
Step-by-Step: How to Conduct a Hive Inspection
Step 1: Approach and Smoke
Approach the hive from the side or back, never directly from the front (the flight path). Puff 2–3 puffs of smoke into the hive entrance and wait 30–60 seconds. Puff a few more puffs of smoke over the top of the hive before opening the cover.
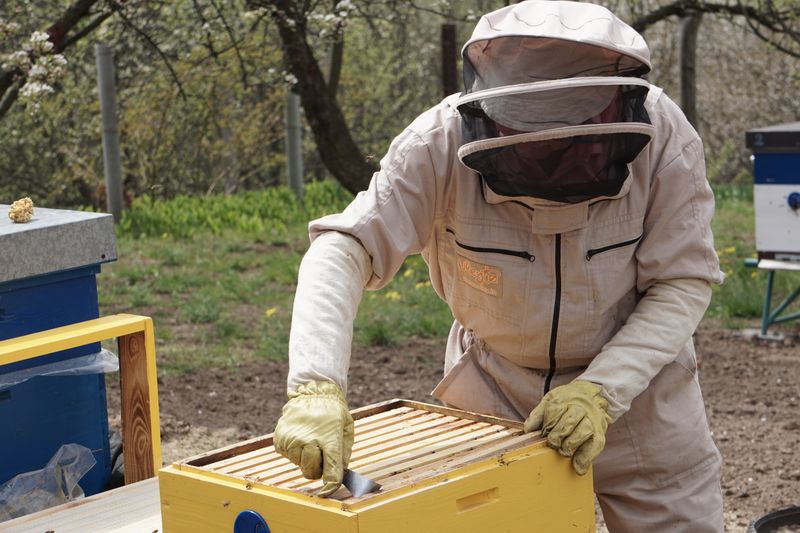
Step 2: Remove the Outer Cover and Inner Cover
Use your hive tool to break the propolis seal on the outer cover and set it face-down on the ground beside the hive (never block the hive entrance). Puff smoke across the exposed top of the frames. Remove the inner cover and set aside.
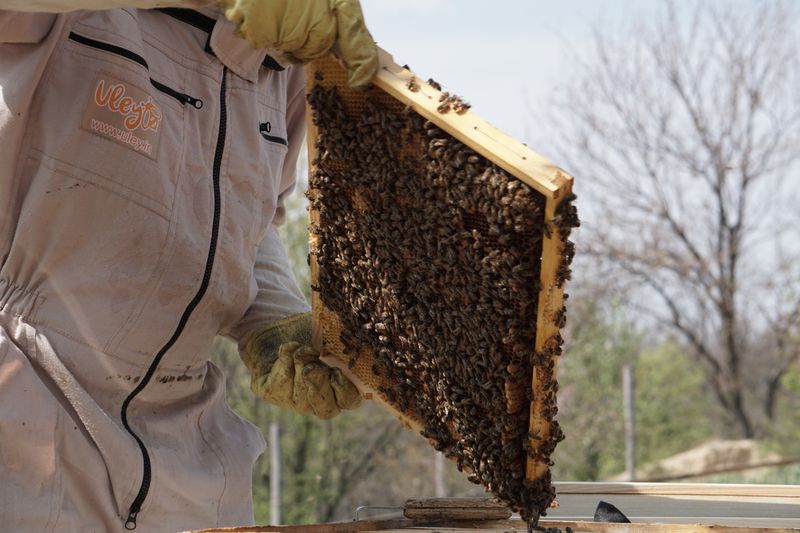
Step 3: Remove and Inspect Frames One at a Time
Start with an outer frame (usually stores/honey, less brood) — this gives you space to work and you're less likely to injure the queen on the outer frames. Use your hive tool to break the propolis seal and gently pry the frame away from its neighbors before lifting. Hold the frame vertically — like a window in a wall, not horizontally like a book. Comb is attached at the top bar only; holding it at an angle stresses the comb and can cause it to break.
The FEED Inspection Checklist
F — Food (Honey and Pollen Stores)
Look for frames with capped honey (darker wax capping over honey cells) and open cells of bright pollen. A strong hive should have at least 2–3 full frames of capped honey. In early spring, low stores are an emergency — a colony can starve in days if weather keeps them confined.
E — Eggs
Eggs are tiny white grains, like a grain of rice standing on end in the bottom of the cell. Tilt the frame so light shines into the cells from behind your head. Fresh eggs (1–3 days old) indicate the queen has been laying within the last 72 hours. No eggs + no young larvae = possible queen problem, investigate.
E — Expansion
Is there space for the colony to grow? If the brood nest frames are wall-to-wall with capped brood and the remaining frames are packed with honey, the colony is becoming honey-bound — there's no room for the queen to lay. A full hive with no expansion space is a swarm risk. Add a super or additional brood box when 7 of 10 frames are drawn and occupied. Check our common beginner mistakes to avoid this error.
D — Disease and Pests
- Varroa mites: Tiny reddish-brown dots on adult bees or on white larval bodies. Conduct a formal varroa count monthly.
- American Foulbrood (AFB): Capped cells that appear sunken, perforated, or discolored (brown rather than tan). A matchstick twisted in the cell pulls out a ropy, stretchy, brown thread and smells like rotting flesh. Contact your state apiarist immediately if suspected.
- European Foulbrood (EFB): Larvae twisted, discolored (yellow-brown), dead before being capped. Smells sour.
- Small hive beetles (SHB): Small, dark beetles scurrying away from light when frames are exposed.
Step 4: Reassemble and Record
Replace frames in their original order. Replace inner cover, add a small puff of smoke, replace outer cover. Make notes immediately after inspecting: date, frames inspected, eggs visible (Y/N), brood condition, food stores, any concerns.
The Inspection Frequency Schedule
| Season/Situation | Recommended Frequency |
|---|---|
| New hive, first year | Every 7–10 days — Bee Culture magazine has seasonal inspection guides |
| Established hive, active season | Every 2–3 weeks |
| Before and after major nectar flows | Weekly — swarm risk assessment |
| Winter (below 50°F) | Don't open; assess by weight and hive activity |
| Post-swarm | 10–14 days later to check for new queen laying |
Recommended Products
Frequently Asked Questions
How often should you inspect a beehive?
Inspect new hives every 7–10 days during the first active season so you learn what a healthy hive looks like and catch problems early. Established hives can be inspected every 2–3 weeks during the active season. In winter, don't open the hive unless you have specific concerns — cold air disrupts the cluster.

What is the best time of day to inspect a beehive?
The best time for hive inspection is mid-morning to early afternoon (10 AM to 2 PM) on a warm, sunny day above 65°F. At this time, forager bees are out gathering, so the population inside is smaller and calmer. Avoid inspecting in the evening, cold weather, or before rain — bees are notably more defensive when barometric pressure drops.
What am I looking for during a hive inspection?
Use the FEED checklist: Food (honey and pollen stores), Eggs (fresh eggs = queen present within 72 hours), Expansion (space to grow or you risk swarming), and Disease/pests (varroa, foulbrood, beetles). You don't need to see the queen — seeing fresh eggs confirms her recent presence.
How do you find the queen during a hive inspection?
Queens are larger than workers and have a longer abdomen. Look for a bee that other workers are facing and touching — attendants cluster around the queen, creating a distinctive retinue behavior. You don't need to see the queen every inspection — if you see fresh eggs (tiny white grains standing upright in the bottom of cells), the queen was there within the last 3 days.
What does a healthy beehive look like inside?
A healthy hive has: capped brood in a solid, contiguous pattern with few empty cells, fresh eggs and uncapped larvae at multiple stages, adequate honey stores (at least 2–3 full frames), visible pollen in cells adjacent to brood, and bees that are active but not overly defensive or clustering unusually.
Get weekly guides from HivemindGuide
No spam. Unsubscribe anytime.